• Help Support Hardline Crawlers :

Family Rock Kia-rawler

dobber

Well-Known Member
Joined
Apr 10, 2006
Messages
460
Location
Cosmopolis, WA
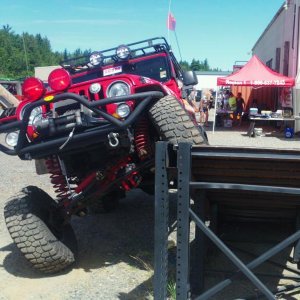
I've spent the last 4 years wheeling solo and leaving my family at home. It's time for a change. Time for a light duty family rig. Would like to keep it street legal but we will see. This will be a 2 stage build, first stage is to get chosen rig running and driving as a stock rig with motor swap. Second step, build a unique rock crawler out of it.

Enter the 2wd 2005 Kia Sorento. Wanted to do something different than the normal 4runner or Cherokee. Picked up my Kia for $500 with a blown engine. Sorentos have a full frame so if will be nice to work with.

Final product plans

-5.3/th350/205 swap
-One ton or custom 9in axles
-bumpers/sliders/cage
-Undecided on 37-42in tire

Future Kia-rawler

View attachment 60524

View attachment 60525
 

Attachments

  • IMG_20160501_142701510.jpg
    IMG_20160501_142701510.jpg
    43.2 KB · Views: 578
  • IMG_20160501_142635477.jpg
    IMG_20160501_142635477.jpg
    28 KB · Views: 589
Nice.

Amazing garage. Haven't seen a garage that clean since..., well, never.

Also, putting big tires on a rig with those small wheel openings will be challenging. Be an interesting problem to solve. Make sure to post lots of pictures. Jantz put 36s on his Isuzu Rodeo, and had to cut out portions of his firewall / inner fenders. Probably be easier for you, as you can stretch the wheelbase when you go solid axle.
 
Last edited:
I remember traildemons, he bought some of my old Toyota axle parts for that thing.

I have had the Kia with the motor pulled already for probably 4 years and the motor transmission and transfer case as well. Just haven't had time or the space to work on it. Now that my shop is a little bit set up and ready I started working on this a month or two ago.

I don't have any pictures from my first test fit but in doing that I realized the stock manifolds would not work, driver's side exited right into the stock steering shaft, and the truck oil pan would not work. The steering rack right in the way. So a mast Motorsports oil pan and headers it is.

View attachment 60537

View attachment 60538

View attachment 60539

View attachment 60540
 

Attachments

  • IMG_20170304_162845888.jpg
    IMG_20170304_162845888.jpg
    34.4 KB · Views: 464
  • IMG_20170211_112058154.jpg
    IMG_20170211_112058154.jpg
    60.4 KB · Views: 473
  • IMG_20170202_061606915.jpg
    IMG_20170202_061606915.jpg
    36.2 KB · Views: 473
  • IMG_20170202_061709003.jpg
    IMG_20170202_061709003.jpg
    28 KB · Views: 486
Nice.

Amazing garage. Haven't seen a garage that clean since..., well, never.

Also, putting big tires on a rig with those small wheel openings will be challenging. Be an interesting problem to solve. Make sure to post lots of pictures. Jantz put 36s on his Isuzu Rodeo, and had to cut out portions of his firewall / inner fenders. Probably be easier for you, as you can stretch the wheelbase when you go solid axle.

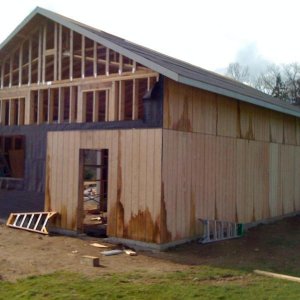
Thanks, just finished most of work on shop so now I do do fun project stuff.
View attachment 60541

View attachment 60542

I'm planning on driving a rig stock vehicle for a while wheel openings won't be touched just yet. But when the axle swap stuff happens front should be easy like you said, frontal will be moved forward a little bit and fenders trimmed. The rear I will probably be moved back a little bit as well and rear bumper off should give me some good room back there as well.
 

Attachments

  • IMG_20170212_170842276.jpg
    IMG_20170212_170842276.jpg
    32.4 KB · Views: 473
  • IMG_20160821_173814122.jpg
    IMG_20160821_173814122.jpg
    47.2 KB · Views: 471
Going to have quite a few post right at the start since I am little ways into this project and thought, hey, I should be doing a build thread.

Going to use the stock steering and going to try and use stock radiator abd fans for now. To get everything to fit I needed the engine to go back a few inches. Also, since this was a two-wheel drive the tunnel underneath was not big enough for the transfer case. Decided to do a 3 inch body lift for everything to fit. Probably would not have done a body lift if I didn't need to make this rig drivable as a stock looking rig for a while because I need something to drive while my tow rig is getting repaired.
 

Attachments

  • IMG_20170219_094853945.jpg
    IMG_20170219_094853945.jpg
    20.8 KB · Views: 590
  • IMG_20170219_094908550.jpg
    IMG_20170219_094908550.jpg
    21.2 KB · Views: 589
  • IMG_20170206_074813586_HDR.jpg
    IMG_20170206_074813586_HDR.jpg
    42.3 KB · Views: 592

Attachments

  • IMG_20170222_184740524.jpg
    IMG_20170222_184740524.jpg
    48.1 KB · Views: 587
  • IMG_20170220_194511064_HDR.jpg
    IMG_20170220_194511064_HDR.jpg
    37.6 KB · Views: 586
  • IMG_20170219_163153131_HDR.jpg
    IMG_20170219_163153131_HDR.jpg
    32.9 KB · Views: 580
  • IMG_20170219_163140997_HDR.jpg
    IMG_20170219_163140997_HDR.jpg
    33.5 KB · Views: 590
  • IMG_20170219_094826374.jpg
    IMG_20170219_094826374.jpg
    52.1 KB · Views: 578
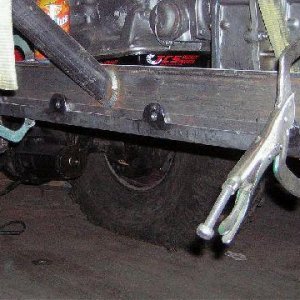
Ran into issues with body lift. Stock did bolts to long and hit new mounting bolt for block. Ended up trimming stock body bolts as much as possible and they still hit. After trimming they still hit so I got rid of bolt on idea and welded them on.

View attachment 60557

View attachment 60558

After cutting all body bolts and the body going off and on about 20 time I managed to screw up 3 of the threads in the start. Made this nifty tool to clean threads up starting in middle of bolt going to the end.
View attachment 60559

View attachment 60560
 

Attachments

  • IMG_20170225_175159255_HDR.jpg
    IMG_20170225_175159255_HDR.jpg
    31.6 KB · Views: 525
  • IMG_20170411_101013.jpg
    IMG_20170411_101013.jpg
    23.5 KB · Views: 524
  • IMG_20170319_111031857.jpg
    IMG_20170319_111031857.jpg
    35.9 KB · Views: 517
  • IMG_20170319_111110381_HDR.jpg
    IMG_20170319_111110381_HDR.jpg
    49.6 KB · Views: 526

Attachments

  • IMG_20170409_165505912.jpg
    IMG_20170409_165505912.jpg
    29.5 KB · Views: 514
  • IMG_20170409_102847745.jpg
    IMG_20170409_102847745.jpg
    31.1 KB · Views: 508
  • IMG_20170409_102839674.jpg
    IMG_20170409_102839674.jpg
    28.8 KB · Views: 528
  • IMG_20170319_135758036_HDR.jpg
    IMG_20170319_135758036_HDR.jpg
    38.8 KB · Views: 526
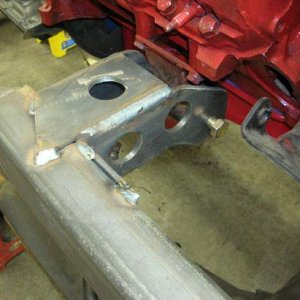
Motor, transmission, t-case mounts are done.

Was going to go off is stock motor mounts because mounts in engine lined up perfect. But since stock exhaust manifolds didn't work and I had to get center dump headers I had to make new mounts
View attachment 60566

View attachment 60567

View attachment 60568

View attachment 60569

Transmission mount lines up perfect with stock crossmember so that was easy. Just had to drill a couple holes and weld a plate on bottom. Cheesy homemade rubber mount for now. Will get new above skid mounts when made into crawler.
View attachment 60570

View attachment 60571

View attachment 60572

Added mount on rear of tcase to help support it
View attachment 60573

View attachment 60574

View attachment 60575
 

Attachments

  • IMG_20170313_183003634.jpg
    IMG_20170313_183003634.jpg
    37 KB · Views: 405
  • IMG_20170304_230554534.jpg
    IMG_20170304_230554534.jpg
    35.1 KB · Views: 406
  • IMG_20170304_162833775.jpg
    IMG_20170304_162833775.jpg
    38.3 KB · Views: 405
  • IMG_20170211_094410276.jpg
    IMG_20170211_094410276.jpg
    29.4 KB · Views: 408
  • IMG_20170305_182755625_HDR.jpg
    IMG_20170305_182755625_HDR.jpg
    41.3 KB · Views: 411
  • IMG_20170308_181019762_HDR.jpg
    IMG_20170308_181019762_HDR.jpg
    27.5 KB · Views: 406
  • IMG_20170310_232725785.jpg
    IMG_20170310_232725785.jpg
    28.1 KB · Views: 404
  • IMG_20170310_232635569.jpg
    IMG_20170310_232635569.jpg
    45.4 KB · Views: 410
  • IMG_20170310_232659983.jpg
    IMG_20170310_232659983.jpg
    22.5 KB · Views: 411
  • IMG_20170308_192008931_HDR.jpg
    IMG_20170308_192008931_HDR.jpg
    35.1 KB · Views: 417

Attachments

  • IMG_20170311_150439272.jpg
    IMG_20170311_150439272.jpg
    70.1 KB · Views: 412
  • IMG_20170311_144709242_HDR.jpg
    IMG_20170311_144709242_HDR.jpg
    53 KB · Views: 425
  • IMG_20170311_140735954.jpg
    IMG_20170311_140735954.jpg
    28.2 KB · Views: 412
  • IMG_20170311_114300644.jpg
    IMG_20170311_114300644.jpg
    29.5 KB · Views: 417
  • IMG_20170311_114316095.jpg
    IMG_20170311_114316095.jpg
    22.7 KB · Views: 416
  • IMG_20170202_061546682.jpg
    IMG_20170202_061546682.jpg
    41 KB · Views: 409

Attachments

  • IMG_20170313_194844905.jpg
    IMG_20170313_194844905.jpg
    29.4 KB · Views: 412
  • IMG_20170328_190826977.jpg
    IMG_20170328_190826977.jpg
    27.8 KB · Views: 415
  • IMG_20170328_190915623.jpg
    IMG_20170328_190915623.jpg
    32.5 KB · Views: 414
  • IMG_20170328_201229650.jpg
    IMG_20170328_201229650.jpg
    24.2 KB · Views: 413
  • IMG_20170328_201306203.jpg
    IMG_20170328_201306203.jpg
    39.7 KB · Views: 413
Man the frame on that thing really seems wide! Not a bad thing at all. Your mounts really had to go deep into the center to catch the V8. I love how much room is in that frame.

Also I really like how you attempted to keep the interior "stock" looking by making sure the shifter fit within the KIA center console.

Great work man.
 
Thanks, the frame is 28 1/4in at the motor mounts(5 1/4 in wider than my Toyota frame). And 40in wide at main rails, (4in wider that my Toyota frame).

Putting just the shifter in there was fairly easy (once I figured out where all the hidden screws and clips were) to keep the interior look stock. Later I will need to add transfer case shifters and might have to cut into some stuff
 
Back
Top