• Help Support Hardline Crawlers :

Chattanooga Whiskey Buggy Refresh

wizzo

Well-Known Member
Joined
Dec 5, 2007
Messages
1,988
Location
glasgow, ky
Andrew (redneckengineered) and I had been talking about him either having a new chassis built and me swapping parts or doing a full tear down and refresh on his current buggy. He was happy with just about everything on his current and the OG Revolution WOD chassis. So the decision was made to go through with the full tear down and refresh. Andrew had a good list of specific points he wanted addressed or updated. This buggy was built in 2011, lots has changed since then and some parts were already updated along the way. But the hope was to bring things up to speed with the current technology.

Andrew had already ordered some new seats and stripped the panels off to do a good pressure washing before I tore into it.
20180715_163938.jpg


First thing to do was add some rub rails and fix some damage tubes.
20180929_190547.jpg


20180929_162937.jpg


Transmission cooling was one thing Andrew wanted to update. You can see above the smaller griffin fluid cooler he had been using. While it worked ok, it left something to be desired. I have been running a large CBR fluid cooler on my buggy for a few years. We decided that was the way to go. It's a tight fit but it's in there.
20190809_152622-2.jpg


Upgraded radiator was also a must. Andrew hadn't had any major heat issues but it was something he didn't want to have any concern about anymore. Again CBR got the nod. Quality is second to none.
20181105_151013.jpg


I built a "sandwich" style mount for the radiator. That way any chassis movement does not get transferred to the radiator.
20181219_171332.jpg


20181219_171609.jpg


Added a rear "bumper" for them late night trail racing! It's .250 wall if anyone thinks they want to test it! LOL
20180930_123917.jpg


Fresh skins
20181013_141039.jpg


20190112_105523.jpg
 
More aluminum
20190216_152642.jpg


New shifter and console with cup holders.
20190222_150050.jpg


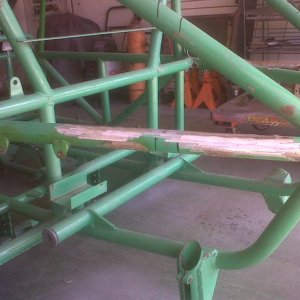
Straitened and reinforced the lower bars on the chassis
20190120_150934.jpg


20190120_165012.jpg


All link tabs and shock tabs got weld washers. Lower link tabs got reinforcement!
20190202_203822.jpg


Obviously there was a ton of other work but that was basically the high points before the chassis got sent to Nashville to be re powder coated
20190223_111311.jpg
 
Something in particular Andrew wanted to upgrade was the gauges. He had done a bunch of research and decided on the AEM CD-7 set up.
20180828_122139.jpg


20190925_164733.jpg


20191115_160803.jpg


Andrew worked with both MAST motorsports and AEM to get the MAST ECM and AEM CD-7 to work together. This is the basic display you get. Andrew has a custom lay out and back ground he can share.
20191122_144424.jpg
 
Both front and rear axles got some love. Front axle was pretty fresh build so I pulled the cover, inspected, resealed everything and painted the housing. The braided brake lines had to go. Steering ram got rebuilt, lightened things up quite a bit with new Mark Williams brake kit and tied the steering arms into the knuckle.

20190509_142148.jpg


signal-2019-10-30-173344.jpg


20191002_083149.jpg


signal-2019-10-28-162303.jpg


signal-2019-10-28-161139.jpg
 
The rear was torn down completely and the third member was sent off to be freshened up. Axle got fresh paint and new Mark Williams brake kit.
20190517_170126.jpg


20190518_145137.jpg


20191121_112103.jpg


20191121_112017.jpg
 
We couldn't just go back with the 2.0 radflo's he had before. Andrew pulled the trigger to step up to some 2.5's! I also shortened the stroke on his bump stops and rebuilt them.
signal-2019-03-04-130627.jpg


20191112_105739.jpg


Transmission was sent back to PTC to be freshened up and added an ultra bell
20181214_084548.jpg


Fresh Sanderson headers with v bands welded on from WOD
20190707_162055.jpg


I wrapped with DEI titanium heat wrap
20190714_203830.jpg


New exhaust through out and muffler. All wrapped.
20191121_112241.jpg


20191121_112250.jpg


20191121_121737.jpg


20191121_121751.jpg
 
Wiring and plumbing is something I enjoy. I thinned out his engine harness and replaced the plastic loom with mesh. All accessory wiring was replaced. New switches, fuse panels and relays. All new hoses everywhere.

20190424_153956.jpg


20190424_165529.jpg


signal-2019-08-15-181338.jpg


Got rid of this large factory connector
signal-2019-08-22-153408.jpg


20190816_165039.jpg


20190822_152858.jpg


Ditched the white connectors the SPAL fans come with for some weatherpak
20190707_153049.jpg


20191126_233718.jpg


20191126_233731.jpg
 
All new hydraulic lines made in house and replaced a few brake lines
20191030_173333.jpg


signal-2019-10-30-173532.jpg


New fuel line with heat wrap and secured to the fire wall
signal-2019-08-19-083236.jpg


signal-2019-08-19-083252.jpg
 
Random details

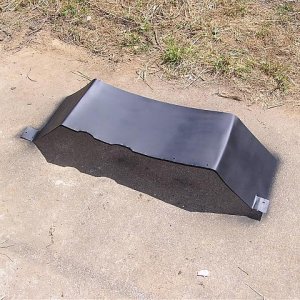
Used the existing panels but cut this one out and added wire mesh to allow some air flow around the trans cooler
signal-2019-06-14-141512.jpg


Something I like to do is make sure the link tabs and shock tabs are contacting the shank of the bolts. I buy longer bolts and trim to fit. This gives you the most strength in what I feel like is critical points.
20190622_095205.jpg


New hardware
20190609_153604.jpg


Old hardware
20190609_153553.jpg


signal-2019-06-22-130440.jpg
 
received_2161501814154218.jpeg


Chattanooga Whiskey Buggy 2019 Refresh Walk Around

I truly appreciate the chance to rebuild this buggy for one of my best friends. It was a very nice buggy to start with and hopefully Andrew will enjoy it for many years to come.

Any questions yall have about things I did etc, I'll be glad to answer. I hope to be able to keep adding tech to Hardline.
 
Last edited:
Something I like to do is make sure the link tabs and shock tabs are contacting the shank of the bolts. I buy longer bolts and trim to fit.
This has always been very important to me and is something I do for everything I build. Their is significantly more strength at the shank than the diameter at the root of the threads. Also the threads like to flatten out or dig into the tab causing it to get loose over time and compound stress.

Buggy looks new and I'm sure will work better than ever.
 

Latest posts

Back
Top