• Help Support Hardline Crawlers :

Cheerleader Jeep... 1 ton edition

Make sure that your pick up line is not directly next to your return line where it enters and exits the tank. Even put your return line at the top of the tank. You will get some aeration to your pump on off angle obstacles if they are right next to each other.

Not sure if you did this already. Looking good man. Start saving for a real fuel cell in a few months of wheeling. Everyone is correct. Those tanks blow for wheelin and the welds will blow out regardless of how it is mounted. But you can always keep band-aiding an injury if you know what I mean.

The pickup and return are both at the top of the tank, right next to each other. Obviously the pickup has some kind of hose on it internally so it picks up from the bottom of the tank.

Like I said before, I don't have much other choice than to make this cell work because of my space limitations running the back seat. I could have something custom made I guess, we'll see how this one holds up.
 
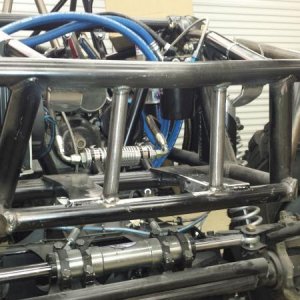
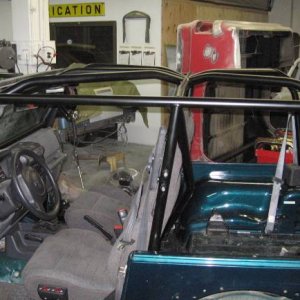
Here's my orbital mount in progress. I will be adding a small bolt-in brace to the lower end that will incorporate at least two of the valve housing bolts just for a little extra bracing. Also, I added a heim that supports the steering shaft going into the orbital.

The steering shaft assembly is out of a cherokee, it was the perfect length (YJ one was way too long) and bolted right up to the YJ column. I cut the input shaft off of a junk manual YJ steering box that xraidedj gave me so I would have the splines to clamp the steering shaft to. This is a nice trick, because the input shaft on the steering boxes is just a hair under 3/4" so it works good with a 3/4" heim for support. I just "machined" (with a grinder) the matching keyed shape onto the other end of the stubby input shaft for the orbital, and made a little bushing/seal plate out of some 1.5" tube and a rubber bushing I dug out of the parts bin.

I think you could do the same setup with the input shaft on a power box as well, but you'd have to take it apart to get the shaft out. The manual boxes have a lot of the shaft showing because they're a lot smaller.
 

Attachments

  • 20868_445762736653_657761653_5976464_3863437_n.jpg
    20868_445762736653_657761653_5976464_3863437_n.jpg
    71.6 KB · Views: 423
Question about my ram mount... The ram I have has a clevis setup on the ram side, and will have a heim on the piston side... My plan was to use some 1" plate to make the ram mount on the diff cover, and punch a 3/4" hole through it and use a grade 8 bolt and metal lock nut... but now I'm rethinking that. I'm going to run the tierod in the stock steering arms, and the ram will be mounted behind it.

Putting some tabs on the tierod to sandwich the heim will put it flat, so that takes care of lateral movement of the ram... but if I mount it to the diff cover like I'm planning above, I won't have any vertical give.... am I going to rip my mount off the cover like this? Given 5 degrees of caster, how much vertical movement am I going to get with the tierod?

Hmmm..... Bunk you have a PM about a tierod... guess I won't be able to figure out how things are gonna go together until I have that. :awesomework:
 
One more note about the orbital valve mount... After taking this pic and pondering for a bit, I realized that I have everything pretty solidly mounted with no slip in the steering shaft. However I have my tub solidly mounted to the frame via the rocker panels, and the rest of the cage will be tied to the body and frame as well, including the tube that will run from the A-pillar to the front grill hoop, so everything is going to be pretty well solid. I'm crossing my fingers and hoping for no problems with frame twist, especially on a YJ frame.
 
You are thinking too hard.. The ram will need a tiny bit of movement to go along with the tie rod. Unless you are rebuilding the mount and the clevis with some uber tight tolerances you'll never have an issue.
 
I got enough frame flex to pull the steering shaft out of the orbital, I would recommend a slip section

Yeah mine too ask binder what he had to do to put a trail fix in place.:eeek: think standing on my steering wheel jumping up and down :booo:
 
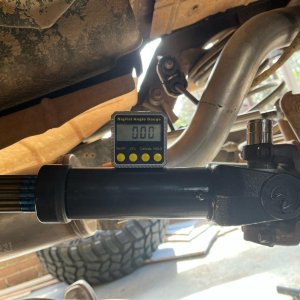
I redid the steering shaft the night before last.... I ended up using the stock YJ shaft, but I had to tear it apart and lube it up so the slip would actually work as intended. I put a lock plate spring from a XJ column between the (mostly compressed) lower slip in piece and the upper receiver type piece on the shaft, to keep the short shaft in place on the orbital valve, since it doesn't have a c-clip or anything to keep it from pulling out (just the heim to ride on and the rubber bushing/seal to keep dirt out).

It worked perfect, just enough compression on the spring to keep things tight, and the newly greased slip moves out with very little pressure so if things try to compress I'm good, it will just compress the spring... and if things move out, the slip will take up the slack and the spring will keep some pressure on that shaft going into the orbital.

I'll take pics tomorrow for the visual learners... tonight I'm still recovering from hot tubing with several naked women.

[EDIT]: I also ordered U-bolts, spring plates, 1350 yokes and QA1 XM series rod ends, safety washers and jam nuts for my tie rod today. Bunk is building me a solid 1.5" chromo tie rod, I'm hoping I can run it on top of the steering arms but I won't know until I have it and can actually mount it up.

Oh yeah, and Geno from advance adapters has my Atlas all built and ready to ship, so once I get that I can start building a crossmember/skidplate and get working on the driveline situation.

Yeehaw!
 
Dually hubs cleaned up and installed. Moved the 2" spacers to the back. Should be a good fit with some big tires and H1's. Got my front calipers today and mounted those up. A little tip for anyone with a later Ford D60 that uses the rubber and metal pins to hold the caliper on... put a tack weld on each of the pins, they like to back out.

I got the E-350 master cylinder installed today... I told the parts store guy '96 E-350, no ABS. It bolts right up to the YJ booster... didn't even have to adjust the push rod. We'll see if that will be needed at all after I get it moving and stopping. I'm going to see how it works with no proportioning valve, but I can add a wilwood adjustable one in later if needed.

Speaking of tires... I sold the 42's back to the guy I bought them from, so I'm back on the hunt for tires. Not sure yet what I want, wish I could find some pitbull rockers in 16.5, but I'm not made of money so I can't buy 'em brand new.
 

Attachments

  • 35253_447224506653_657761653_6018282_1454676_n.jpg
    35253_447224506653_657761653_6018282_1454676_n.jpg
    71.1 KB · Views: 418
dayum.... that looks wiiiide.
You measured width yet? I'm 76f/78r on YJ and 80f/78r on TJ and there are places (Rimrock) I fit, but not by much.
 
dayum.... that looks wiiiide.
You measured width yet? I'm 76f/78r on YJ and 80f/78r on TJ and there are places (Rimrock) I fit, but not by much.

The front 60 is narrowed 6 inches so the spring pads line up perfect with the YJ frame rails, so WMS is only 3 inches or so wider than a full width with the dually hubs. I'm running H1 wheels unrecentered, so everything should tuck in and be a few inches narrower than standard rims on full width axles. I'm keeping my SRW hubs in case I want to swap back and put the 2" spacers back on the front. It all depends on how wide of a tire I end up running.

After all is said and done, it probably would've been simpler to outboard the springs and run some recentered H1's or some other beadlocks with standard backspace, but who does anything the easy way these days? We'll see how it works when it's done I guess. Can't really undo the chop down on the front axle now without spending a bunch of money and re-doing a bunch of stuff. :redneck:
 
The limiting factor on width, is when the tires rub the front leaf springs while turning. I'd TRY taking ALL of the wideners off the front, and turning the wheels lock to lock. Measure the amount of angle you obtain. Then adding the 2" spacers and remeasuring the angle. Then adding the dually hubs and trying again. You may find it's a very minor gain in steering angle by widening the front. It's been my experience that the narrower the axle, the better. At least for the Pacific Northwest. However the larger the tire, the wider the axle needs to be, in order to be able to turn a reasonable sharp corner.

After that's determined, match the rear axle to the front. Narrowing a rear is pretty cheap and easy. Widening it is even easier.
 
If you want to go back to 42's I bet I know of a set in near perfect condition for far less than you paid for that other set... Low street miles and a couple mud drag events are all they were used for.
 
Cool I'll get the info for ya. :D

Any word?

PS, Thanks Bunk! 1.5" solid chromo, 7/8" shank 3/4" bolt QA1's and full thread engagement. Hopefully I won't bend it, it hangs down low but that's the only way I can do it unless I want to notch the frame and run high steer arms....
 

Attachments

  • 37494_453808691653_657761653_6184567_4428541_n.jpg
    37494_453808691653_657761653_6184567_4428541_n.jpg
    65.3 KB · Views: 351

Latest posts

Back
Top