• Help Support Hardline Crawlers :

Never ending Samurai build...

CHASMAN9 said:
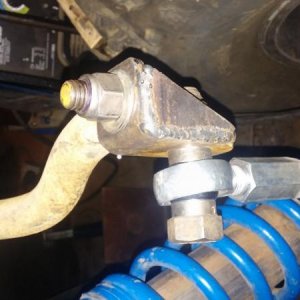
Since that shock mount is just tacked in, could you not just swing it down a little lower and adjust the ride height out of the shock? :dunno:


ADMINISTRATOR

That's been the trickiest thing with this rig and it being so light. With the 14" 70lb springs on the front now I still only have 1" of preload on them to get the desired ride height. If I were to rotate the shock mounts down enough I would probably be in the negative on preload to get the ride height where I want it.

muddinmetal said:
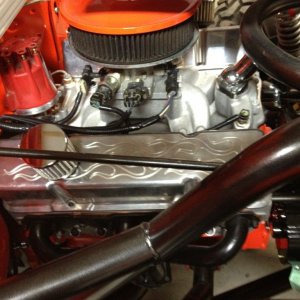
The cooler the air filter is the more power you can possibly make. It may help in the long run to move the filter anyways

I'm thinking I gained at least 5hp from the cold air intake. If I slap a K&N, Airaid, etc. sticker on it that'd be good for another couple wouldn't it?

TBItoy said:
The fittings do exist ::)

See that's what I was thinking. I suppose if I'd just bought these off the shelf I wouldn't mind going the fitting route, but since I paid a little more and let Ryan work his magic on them the intake tube was the easiest thing for me to do with parts I already have laying around. Speaking of parts laying around...damn I need to clean my shop.
 
clemsonjeep said:
I'm thinking I gained at least 5hp from the cold air intake. If I slap a K&N, Airaid, etc. sticker on it that'd be good for another couple wouldn't it?

Hey man, heat leads to detonation. Detonation and boost don't go together to well
 
Detonation was something I struggled with when I was trying to make the TBI setup work. Then once I switched to the CV carb it helped but what really knocked it out was limiting the timing in the distributor.

After talking with Ryan and trying to get the rear springs right we decided I should raise the upper rear shock mounts. This will allow me to run stiffer springs which will combat body roll and combined with the mounts being raised 2" should get the ride height I'm looking for along with having more shaft exposed as well. The new rates will be 100/175 vs the 70/100 I've got now and those should be here Friday.
 
We had a great trip to Harlan for the Hardline Ride this past weekend. It was great to meet some great people and enjoy some of the best wheeling in the southeast. The dust was the only thing worth complaining about the entire weekend.

I don't think I can put into words how happy I am with my rig right now. I've never been a "go fast" person on the access roads, but with the way this thing soaks up bumps now I just couldn't keep my foot out of the skinny pedal. I know Marcus (co-pilot) was looking for something to hold on to pretty often. The ride quality was equally as good crawling...soaking up drop offs, boulders, and whatever we came across.

The only things I've got on top of my mind to work on at this point are:

1. Add a dome light of some sort...we had some great night rides and my exterior lighting was great but it really would have been nice to see inside every now and then.
2. Add a grab bar for the passenger.
3. Lower my steering wheel position...it's still in the factory Samurai location which is too high for how low my seats are.
4. Reinstall limit straps front and rear.
5. Consider a sway bar...definitely not a necessity, but if I'm gonna bomb down the dirt roads I think it'll be a nice addition.

To James, Crystal, John, Josh, JC, Scooter, Dana, Chris, Barry, Ben, and everyone else we rode with...thanks for letting us be a part of the group...we had a blast and can't wait to do it again!

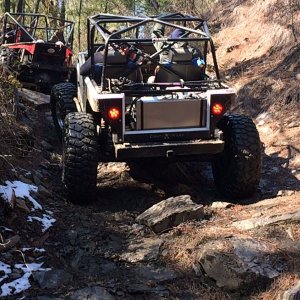
Ryan on Little Jagger - Hardline Ride 10-7-17

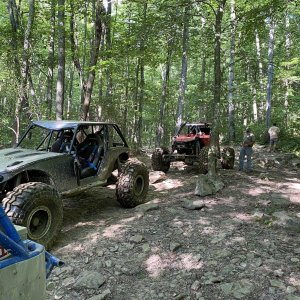
Marcus crawling Lower Rock Garden - Hardline Ride 10-7-17
 
It was a really good ride and a really good group. Props to whoever tuned the shocks! I'm no expert, but it made a huge difference in that rig. And yes I beat my brains out following you down the access road!
 
Always a great time riding with you. Tell Marcus it was great meeting him. Dana and I will be looking forward to the next time. Did you save a little taste for Travis? You could rub it in a little. :stir:

I will get some pics posted up as soon as Dana can get them sorted.

As far as that Samurai, the difference in the ride was obvious and as always it embarrassed rigs with a lot more coin in them. That thing always impresses me and the driver does a great job with it.
 
Forbanger said:
It was a really good ride and a really good group. Props to whoever tuned the shocks! I'm no expert, but it made a huge difference in that rig. And yes I beat my brains out following you down the access road!

There were a couple times...well quite a few times...I wished the dust wasn't so bad simply so we could have kept up with each other gettin it on the access roads.

scooter60 said:
Always a great time riding with you. Tell Marcus it was great meeting him. Dana and I will be looking forward to the next time. Did you save a little taste for Travis? You could rub it in a little. :stir:

I will get some pics posted up as soon as Dana can get them sorted.

As far as that Samurai, the difference in the ride was obvious and as always it embarrassed rigs with a lot more coin in them. That thing always impresses me and the driver does a great job with it.

Nope...what was left Marcus took home with him. I saw a few of Dana's photos floating around on Facebook. Thanks for the compliments as always Scooter!
 
Awesome Samurai!!! Thanks for letting us be a part of the build!! Going fast isn't for everyone, but it can be addicting! :)
 
There must not be many people that ever have a leak with a TG orbital. If so you'd think there would already be information on the website about where to go for replacement seals and such. I didn't find anything online so I called TG and as I assumed I got the "we don't have part numbers and don't sell rebuild parts". commentary.

So I took it upon myself to go find some. Several hydro shops didn't want to have anything to do with me since I didn't "know what the orbital is off of". Finally I found a shop in Florence, SC that would help and they even pulled it apart and replaced the orings while I waited...and only charged me for the orings...$2.46 and done!

For future reference here are the part numbers...these are the three orings at the steering shaft input. Note...one of them he used was a metric oring. He said he tried the SAE equivalent, but that it was too thick.

ce603d94b60aa2154640eac588214dc7.jpg


d8736c6c858550806a6792eb9ec7d171.jpg


9be85f9413c0d50d54646c0b5cb64660.jpg


Sent from my Pixel 2 using Tapatalk
 
I finally ditched the factory steering column since it was at the wrong angle and the wheel was too high. Most times I was looking through the wheel rather than over it.

Since I prefer to keep the fluids in the engine bay I knew I wasn't moving the orbital inside. I started looking for options in the SxS market. Quite a few of them have simple columns and several even have tilt steering. In the end I went with simple and effective. Of course I immediately set out to overcomplicate the hell out of it.

I picked up a piece of 1.5" OD tubing with .088" wall and a piece of 3/4" rod. This allowed me to use some riding lawnmower wheel bearings. They' pretty common and cheap. I got mine off of Amazon here: https://www.amazon.com/gp/aw/d/B01NCQ9FA1/ref=ya_aw_oh_bia_dp?ie=UTF8&psc=1

I already had a quick disconnect installed and had modified it to mount on the factory splines. That meant I needed to modify the 3/4" rod to accept the splined section and while I was at it I'd modify the firewall end to accept the end the steering ujoint fits. When I first attempted to put the 3/4" rod in my mini lathe I found out it only had a 5/8" bore...****. I sucked it up and bored the 3-jaw to 3/4" and rolled on. What I ended up with were two ends with press fit splined sections. I was pretty sure these wouldn't ever spin inside the rod but just to be sure I drilled them and installed roll pins for extra insurance. I went one step further and turned some snap ring grooves at either end to locate the 3/4" shaft in the column as well as to ensure the bearings can't work their way out...they're a hammer tap type of press fit at this point.

My original plan was just to notch the lower dash bar and the stock dash crossmember to to accept the 1.5" column but that would mean I'd need to loosen up the orbital to remove the steering shaft and if for some reason I don't like the length of the new column it'd be a pain to shorten it up. So...next step in overcomplicating things was to build some clamps out of some 1.75" .120 wall DOM I had laying around. Then that meant I needed a 1.75" hole saw to renotch the dash bars.

Since the stock column had the plastic cover I had made the opening in my alumnium dash fairly large so I also had to make a filler plate and add some threaded holes to attach it.

I think it came out nice...

bb075bc64894d5da374a9ecd70cc1b7a.jpg
4d91c2ca3608b5260d1fcbe97c888318.jpg
dfe13f0c594d0faa6715c02082a13e8a.jpg
d6420da36eef602596bcee8a7cd44bd0.jpg
5dea3f4d20b8f321c0a352a34a051dab.jpg
8794e783adce8a1dd2c1ee1c93a116c6.jpg
aea3d488c8858f7330c5f0e96a4284fc.jpg
ba095f3a36a57cd0f9943f07f373e321.jpg
fc16305487e22e3c0e7bd230b2b365e6.jpg


Sent from my Pixel 2 using Tapatalk
 

Latest posts

Back
Top