• Help Support Hardline Crawlers :

Stu's new ride

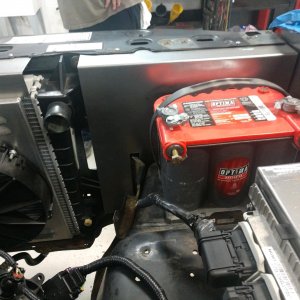
So since the optima battery is about 1" shorter than the stock one I had to whip out a new hold down.

stu-97.jpg


Since this is version 1.0 I chose to keep the battery cables simple and not run my normal single junction. The battery cable and B+ feed to the fuse block were in excellent shape so on the positive side I just had to make a cable to the warn relay box.

stu-98.jpg


stu-99.jpg


Now the negative side needed redone so I went ahead and made all new ground cables.

stu-100.jpg


stu-101.jpg
 
The exhaust leak was driving me nuts so I went ahead and replaced the shot collector gaskets--ya they were toast and missing one of the nuts didn't help much. So now its nice and quiet.

stu-102.jpg
 
I had to clean the shop--I can't stand when **** is everywhere (a little OCD I guess,lol).

So I figured since it was sunny out I would snap a few poser shots.

stu-103.jpg


stu-104.jpg


So next I decided to go ahead and get the ass lifted a tad because that saggy ass was bugging me,lol.

So I should have that done here soon.
 
I sent ahead and whipped out some shackles for the rear(about 2.5" longer).


stu-105.jpg


It now sits damn near level with a bunch of parts sitting in the bed..


stu-106.jpg
 
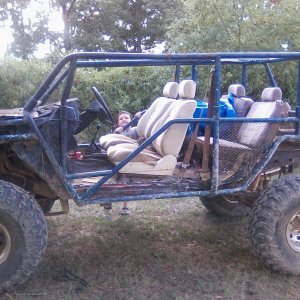
With the seat mounts made up I went and removed all the brackets from the seat rails (with a single rivet and spot weld pretty simple). At first my plan was to use the brackets on the rear of the rails but ended up removing all of them.

stu-109.jpg


After a first rough fit to the brackets on the body I welded some tabs flush against rails.


stu-110.jpg
 
So I setup the seats against the mounts and tach/welded them all up. test fitted one last time and painted the whole works up.

stu-111.jpg


stu-112.jpg
 
I was really happy how they turned out and Stu sat in the rig and he was very happy with them also...

stu-113.jpg


stu-114.jpg
 
So this morning while I was finishing up the seats stu came by and took the rig out for the first time since he dropped it off...

He was all grins and loaded it up and took it home...

So that finish's version 1.0 and next we will take it out for a shake down run.


stu-115.jpg
 
Great job Mike! Tore around the woods a bit and found some ditches to clean. Everything works like designed, bump stops keep rubber and fenders from getting into fights! going to do a once over and make sure everything stayed tight and then hook up the light bar and CB! Thanks so much!
 
The suspension set-up is about dead nuts on! Great job Mike! Now, time to play, version 1.0, officially done and ready!
 

Attachments

  • IMAG1585.jpg
    IMAG1585.jpg
    86.4 KB · Views: 363
  • IMAG1589.jpg
    IMAG1589.jpg
    75.9 KB · Views: 353
If I ever get a day off, I'll do a maiden run and get some pics posted up here.

The only updates I have so far is a sigh of relief that the truck fits on the trailer by about 3/4" and that I got the light bar on.

More to come eventually, maybe after Turkey Day.
 

Latest posts

Back
Top