• Help Support Hardline Crawlers :

deflowered

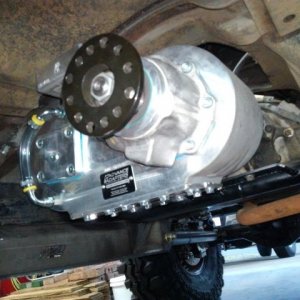
Hi Pinion Elocker Install.

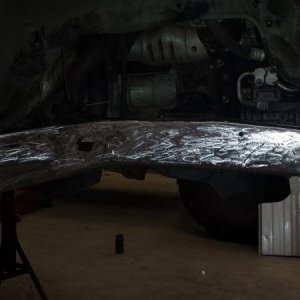
First I cut the Elocker notch and welded up the edge where it is further over than a stock 8 inch diff. Also welded up the two unused diff stud holles.

Then I machined it flat with my grinder.

Then I drilled and tapped out four new 3/8 holes for the Elockers different bolt pattern.
 

Attachments

  • Jp 024.jpg
    Jp 024.jpg
    63.6 KB · Views: 538
  • Jp 025.jpg
    Jp 025.jpg
    56.8 KB · Views: 540
  • Jp 026.jpg
    Jp 026.jpg
    58 KB · Views: 533
  • Jp 027.jpg
    Jp 027.jpg
    51.7 KB · Views: 535
  • Jp 028.jpg
    Jp 028.jpg
    52.6 KB · Views: 534
Fifth stud install

First I smoothed off the top of the knuckle.

Then I bolted up a couple tabs and and the arms to a half inch hole I drilled in the top where I smoothed it off in the first pic then welded them on the arm.

Then I take them off and weld them up fully.

Then I weld a half inch nut inside the knuckle and weld the ends of the steering arm studs inside the knuckle also.

Longfield Plug/namedrop pic. haha.:beer:
 

Attachments

  • Jp 030.jpg
    Jp 030.jpg
    45.2 KB · Views: 527
  • Jp 031.jpg
    Jp 031.jpg
    44.1 KB · Views: 540
  • Jp 032.jpg
    Jp 032.jpg
    53.2 KB · Views: 533
  • Jp 033.jpg
    Jp 033.jpg
    27.5 KB · Views: 540
well I dont think that hi steer is going anywhere now. looks good. p.s. u dont have to kiss bobbys a$$ he already likes ya

I dont kiss any ones ass. I never have or will.

Bob has my respect and has helped me out many times. I consider Bobby and Tina some of my friends, not a vendor. I cant count how many times Bobby and Tina have pulled my numerous beaters up the mountain. Good folks.

Allot of my fab skills have been learned the old fashioned way, watching guys like Bobby build things out in his shop.

Bobby is different than most fab guys. He has a more common sense, old school, simple way of building. Keep it simple. Bobby has always inspired me to try making something myself. If someone else builds it why cant I? Or at least try? I was just over at Bobby a few weeks ago and he had built a new wood stove out of 1/2 inch plate! He will build anything, especially if he doesnt like what he can buy, he will build exactly what he wants. I have learned priceless skills and ideas watching Bobbys many projects.

If you need something, build it mister.:; :beer:
 
I see a lot of porosity in those welds...:fawkdancesmiley:


You also might need to re-calibrate, the machining looks a little off...:redneck:
 
I was looking back at the middle of the build at the links and was wondering whats the advantage of running bushings on the frame side of the links and heims on the axle side? Does it make the heims last longer? School me on links please.
 
Last edited:
I was looking back at the middle of the build at the links and was wondering whats the advantage of running bushings on the frame side of the links and heims on the axle side? Does it make the heims last longer? School me on links please.

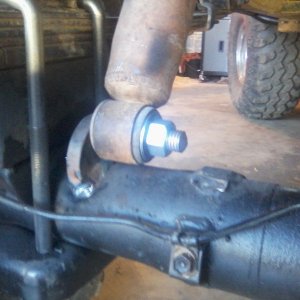
The upper links have 7/8 chromo heims. The lower links have 2 inch poly bushing at the axle and johny joints at the frame end.

Reason for this combo? .....Well I had 4 heims and two Johny joints and a pack of bushings. All were leftovers from previous projects. = paid for.

So I figured Id keep the heims up high, outta the mud on the upperlinks.
Then I figured JJs and bushing for the lowers, so I put the bushing at the axle cuz its dunk friendly and put the JJs at the frame end of the lowers cuz they stay out of the water most of the time and can be greased anyways.
 
I luv ya brad....

But i gotta give ya crap...

Built not bought eh??? Make everything yourself...yadda yadda yadda
 

Attachments

  • bought.jpg
    bought.jpg
    53.6 KB · Views: 544
But i gotta give ya crap...

Built not bought eh??? Make everything yourself...yadda yadda yadda

it came with the diff and I had to fit the bastard anyways. It wouldnt clear the leafsprings properly.

"built or freebie":kissmyass:

Good eye.:beer:
 

Latest posts

Back
Top