• Help Support Hardline Crawlers :

Never ending Samurai build...

clemsonjeep said:
Why didn't you just build one tons...

Yep...show up with a yota rig and be ready for the commentary. I'm really looking forward to getting them on a trail. Just wish I had somewhere closer than 2hrs from home.

Your lighter weight will definitely help. I've done the 1ton thing...and its not that fun with 4cylinders. Drive half way smart and I think the Yota axles and sammi case will last just fine. Anything can break when youre bound up or just wailing on something.
 
Damnit why didn't I grab some sticy tars a long time ago...

IMG_20151114_134516933_zpsi3n6jvzj.jpg


IMG_20151114_134447259_zpsvgrj5ejl.jpg


FB_IMG_1447545524767_zps2iryxp0g.jpg


IMG_20151114_134956200_zpsm7z07rhb.jpg


FB_IMG_1447544907182_zpsj7jedq6s.jpg


Gonna have to get use to marking my territory...
IMG_20151114_140013257_zps5rvemzof.jpg
 
Rode up to the Flats park in NC weekend before last and only ran a few trails before I managed to get it a little hot and the radiator just couldn't take it anymore. Granted it was the factory radiator from the Samurai so it'd done it's job. With space being limited the options were limited but I'd spoken to quite a few guys running the Civic style radiators with success so I looked around and found one made by G-Plus on eBay. Not only is it all aluminum, but it's a 3 row (stock Samurai is 1 row with plastic tanks) AND it was made with 28mm (1 1/8") hose connections which mates up with the stock hose sizes. I also picked up an aluminum shroud and fan combo from eBay while I was at it. Everything showed up yesterday...and overall I'm really happy with the quality of the parts.

I'd gone to Pull A Part and picked up a handful of the rubber mounts from Hondas and a few other import cars so I could pick which ones would work best.

IMG_20151201_135543100_zps4qm1icvh.jpg


IMG_20151201_135616148_zps4irleaih.jpg


IMG_20151201_193804440_zpsdv7ezep9.jpg


IMG_20151201_193828807_zpsjhdxim0z.jpg


IMG_20151201_205657819_zpspvq1pqff.jpg
 
Thanks John...pretty much wrapped it up last night. Just need to mount the overlow botttle and pour in some coolant. While I'm at it I believe I'll make some actual mounts for the power steering cooler rather than just using zip ties. I'd bought a new fan switch along with a 3/8" weld bung to use with this setup, but the switch only has terminal so it's a grounding switch and my wiring is for the switch to supply 12v to a relay. So...I removed the switch from the probe that I was using in the stock radiator and drilled and tapped the tube for 6-32. Since the 6-32 isn't a pipe thread I cut a piece of rubber hose and screwed the switch down snug with the rubber between it and the tube. Hopefully that will work.
 
Made a trip to Gulches this past weekend along with easleycrawler (Travis), infamous1, and a few others. Was the first trip out with easley's rig since we redid a few things. The last trip out with mine was a few weeks ago to The Flats. I lost a lower bolt on the passenger front brake caliper which allowed it to rotate up while at The Flats. I got a bolt and fixed that while I was there.

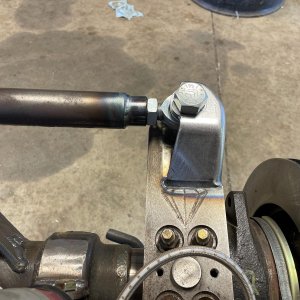
This trip I started hearing something funky and when I pulled over on a trail Travis said something didn't look right on the passenger front. Turns out the rotor had broken off of the "hat". I guess this was just a side effect of losing that bolt and the caliper being able to do some funky stuff. I'm running the IFS hubs with the 95 model rotors that slip on over the hubs and the calipers mount on the outside of the knuckle ears. So...it's not quite a perfect setup but it works great. In any case we ran back up to the parking area and pulled the pieces of the rotor off and zip tied a 5/8 socket in the caliper to keep it from blowing out.

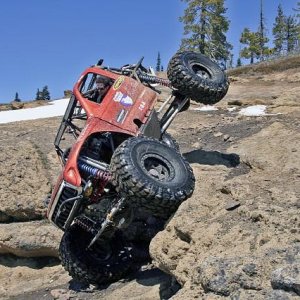
Then later in the day I'd been noticing a lack of power so I stuck my head under the hood to find that 2 of the 3 bolts that hold the turbo to the manifold had backed out over half way. What is it with the bolts backing out? Never had issues like this before. Got that sorted out and had a good time the rest of the day...including flopping in Papa Gulch. Got it on all 4 again and made it out the top. Headed home around 6pm and pulled of on an exit to get some fuel and when I pulled up to the pump I looked in the mirror and could tell something didn't look right. The hood pins had both broken off (aluminum pins) and the hood had flown up and hit the cage...FAWK. Oh well...threw some bungee cords on it and got back on the road after filling the truck up.

IMG_20160206_205710213_zps6xias217.jpg


IMG_20160206_165116961_zpslremyqtz.jpg


IMG_20160206_190248139_zpswsyojhzv.jpg


IMG_20160206_190622743_zps9lu3i1oh.jpg


A little more work and it'll be close to how it was before.
IMG_20160207_113100790_zpsbxrfi4xn.jpg
 
Yeah...I'm guessing the tree at the beginning of the trail damaging the area near the cowl and then flopping onto the driver side had something to do with the pins breaking, but definitely not something I expected.
 
Finally got aggravated enough with my home brew twin stick I'd made when I first built this rig. I'd used two stock shifters and cut the ball section in half. It worked pretty well, but sealing it up was never very good. I went back to looking around at what some others have done for this because in true Samurai spirit I refuse to pay for something I can make myself.

The best option I've seen is one that supazuk94 put together. I wasn't able to come up with the needle bearings like he used, but I believe the bronze bearing will work pretty well in this application. Pretty straight forward setup...just a lot of put it together, take it apart to get it right. I picked up the 1/2" rod and a 12mm 1.25 bolt to use for the shift knobs so I'm hoping to finish this up tonight.

Parts:
bronze bearing 1/2" OD, 3/8" ID - $2.40
steel sleeve 1/2" ID - $1.80
1/4" plate - shift arms - FREE SCRAP
1.25" x .125" wall square tube - $5 1 ft section
3/8" steel rod - drilled thru and tapped 8-32 - $5 3ft section
1/2" steel rod - shift handles - $5.50 3ft section
12mm x 1.25 bolt - to attach knobs - $1.10

Total - $20.80 and a pile of extra material left over

IMG_20160314_221523578_zpsltz1nmzj.jpg


IMG_20160314_221614079_zpsorohck5t.jpg


IMG_20160314_221657842_zpszwybjk7q.jpg


IMG_20160314_221722525_zpsvbfpzcts.jpg
 
Looks like a great trip sucks about the hood and brake, how are liking the BFG tires compared to the old Iroks?
 
jp fan said:
Looks like a great trip sucks about the hood and brake, how are liking the BFG tires compared to the old Iroks?

Contrary to what most people say about the iroks...I really liked them. You just have to keep in mind that this rig only weighs 2700lbs ready to ride so that probably has a huge part in the way they work. I remember countless times I'd come back down an obstacle and have someone ask if they were stickies. I'd have to reassure them they were just plain old iroks...and the only stickies were in other sizes...not 39.5. What I liked the most about the iroks was their flexibility and how well they cleaned out.

The krawlers don't clean out as well, but they still work really...REALLY well in just about every situation I've had them in.
 
I've really been enjoying the turbo setup. It along with the auto trans made a world of difference in my rig. The ability to use high range in 1st gear on some longer hill climbs where I need wheel speed is very nice.

The biggest issue I have is the lack of tuning I am able to do. From a stand still on a hill where I need to have a small, but quick bump I am just out of luck. It takes the motor entirely too long to get moving. I'm attributing all of this to it flooding when I punch it. Of course I have a wideband and have seen this visually on it. Once it works through that it really comes alive and in some cases I have to reel it back in.

I've finally cured my overheating issues with a 3 row civic radiator along with a 13" SPAL puller fan. I had been running the stock radiator with a 14" fan from Advance Auto for the longest time and never had an issue until the turbo. Once the factory radiator gave up I bought the civic radiator and a shroud/fan combo from eBay. The fan was a 12" and was pretty much gutless. The new SPAL could possibly be helping me climb obstacles its so much more powerful.
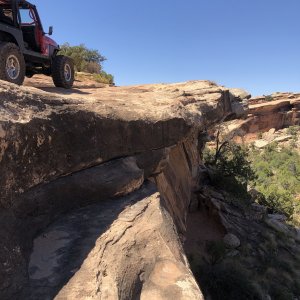
Now...that brings me to where I am now. I've decided to try out a CV carb setup. I'm hoping I can tune it for my uses better than the TBI setup would allow with the FMU. I've gathered a few parts and started building the intake adapter last night.
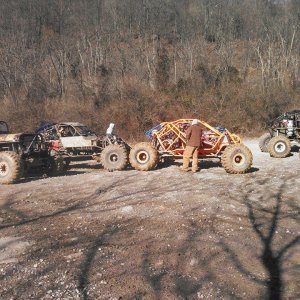
Started with a greasy finger template...
IMG_20160523_171607515_zpsnbj8yqal.jpg


IMG_20160523_173233487_zps39vkipbs.jpg


IMG_20160523_182340577_zpssouvj1js.jpg


IMG_20160523_183103670_zpsd4lpjoil.jpg


IMG_20160523_190037443_zpsyfueqbab.jpg


IMG_20160523_190115411_zpsithjqwwc.jpg


IMG_20160523_190405657_zpsokn6c32l.jpg
 
I've got:

40mm CV Carb
Mallory 4309 FPR
Vacuum Distributor

At this point I need:

build adapter flange for inlet of carburetor with 3" tube
3" to 2" reducer 90 silicone elbow
2" 90 silicone elbow
1/2" steel tube for pitot tube
longer choke cable
modify CV carb for turbo
decide how to mount carb to intake tube (hose, flange, stock HD style clamp, etc.)
build new charge pipe from turbo to carburetor
run 3/8" fuel return to fuel cell
 
Back
Top