-
Help Support Hardline Crawlers :
You are using an out of date browser. It may not display this or other websites correctly.
You should upgrade or use an alternative browser.
You should upgrade or use an alternative browser.
Time to play with the big kids.
- Thread starter Pook
- Start date
Money Mark
Well-Known Member
- Joined
- May 19, 2006
- Messages
- 563
- Reaction score
- 0
I heard this whole buggy thing is all hyped up and not worth it. :corn: Just sell it.....
How much?
How much?
Clark
Well-Known Member
are you going to put a floor under the seats or rear firewall?? will your footwells be open? or sealed up? looks freaking sexy.
Pook
Well-Known Member
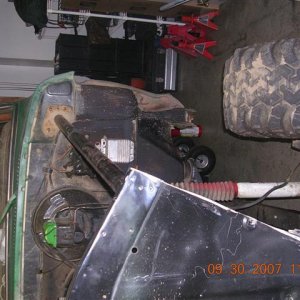
Your sooo earning all your hard work. Interior panel work looks killer, Got a bunch of room huh?
Its real roomy in there. Very hard to believe how much interior space it has until you sit in it.
I heard this whole buggy thing is all hyped up and not worth it. :corn: Just sell it.....
How much?
Show me the $$$$.
are you going to put a floor under the seats or rear firewall?? will your footwells be open? or sealed up? looks freaking sexy.
Footwells are done what you see is what you get. I think that is the norm on most of S&N's bravo2 chassis. I may rig something up for snowwheeling if I get the the urge to go out.
Passenger seat side is done except for welding in the cup/water bottle holder (always drinking water at the comps and end up shoving the bottle somewhere just to have it fall out).
Under the driver's seat will get a heat shield if it needs it. The ceramic coated exhaust is supposed to keep the heat in pretty good. Its been coated inside and out.
Pook
Well-Known Member
Thanks. So close to being done, well done enough to go wheeling.
I want to build some storage racks for trail wheeling, cooler rack etc...I'm trying real hard to fully finish this one so I can say to myself ok its done. At least for a few months.
I want to build some storage racks for trail wheeling, cooler rack etc...I'm trying real hard to fully finish this one so I can say to myself ok its done. At least for a few months.
longfield
Well-Known Member
Sweet nice work.:awesomework:
Pook
Well-Known Member
I'd love to be there, but I'll be running around on the dirt roads between Vegas and Reno that week and won't be flying home until Sunday afternoon. 
When/what is the planned trip after that one going to be? Pm if you want.
When/what is the planned trip after that one going to be? Pm if you want.
stealthrunner1
Well-Known Member
:eeek: why yes what would be the next planned trip???????:eeek::eeek::eeek::; ( Money?):;
Last edited:
Clark
Well-Known Member
:corn:..........................................................:corn:
Pook
Well-Known Member
Just catching up with work and family time after being gone for a week racing Vegas to Reno...I'll be back on it next week. It is so close to being done its driving me crazy.
Pook
Well-Known Member
Proof I've done stuff.
I put my Longfield 300m U joints in the Branik clearanced Superior axles. Also shows how I beefed up the lower link mount since its half mounted on the cast center...please ignore the peined to hell cast welds not very pretty after being beat to **** with hammer while hot. At least they didn't crack and I know they aren't going anywhere.
Installed them in the housings and bolted everything up. Test fitted the Longfield drive Flanges .
Started working out the steering. Custom made 2.25 bore x 9" PSC ram mounted behind the axle, tierod will be in front. Mocking up the rear facing ram mount in the pics. I'll be building some funky custom arms to make this work.
I'll be using the stock knuckles for now, just to get it driving and then I'll get back on my custom fabricated knuckles (which are almost done, just need finish up the jigs for welding and finish designing the side plates)
Attachments
Money Mark
Well-Known Member
- Joined
- May 19, 2006
- Messages
- 563
- Reaction score
- 0
Jesus....who welded your **** together. Looks like a kid did it. :redneck:
Money Mark
Well-Known Member
- Joined
- May 19, 2006
- Messages
- 563
- Reaction score
- 0
That single sheer lower will never work.:fawkdancesmiley:
Pook
Well-Known Member
I'm more concerned about my 1/8" steering arm bending :kissmybutt:
Pook
Well-Known Member
After a couple nights of head scratching I got the Kingpin to Ram mounting hole length figured out so I will use the full length of the cylinder without needing any shims. I then switched to working out the the tierod issue. The main issue being the tierod trying to come through the diff cover at full drivers side turn. The second issue was getting the angles setup to allow for max degree of turning on both wheels and having everything hit at just the right time.
I ended up actually being able to get a more normal ackerman angle and don't have the outside tire turning sharper than the inside tire until it gets turned fairly sharp. Should be nice for higher speed driving.
Got steering? I should have a decent turn radius with the ARBS off and the cutting brakes. :redneck:
Tires just kissing the links. Should clear nicely once the lugs are rounded off.
Attachments
Pook
Well-Known Member
Sarg how far from the kingpin/bearing thingy's on your C's is your tierod mounted? Mines pushing 10" to the center of the hiem to get the tierod to clear the front pumpkin. Can't run real highsteer do to the radiator and frame at full stuff.


