• Help Support Hardline Crawlers :

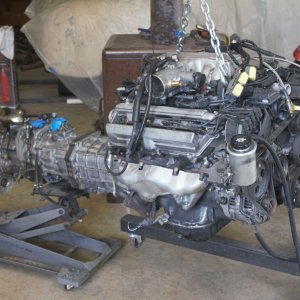
2rz-fe swap

find the front right corner flex hose and follow it up to the 3way on the frame unhook it and then unhook the rears and blow through the one at the front hose/splitter. I think its the top one, I think.

I just take an old fitting and weld it shut for a plug at the splitter.

why all the trouble of tigwelding the exhaust? the exhaust shops dont even do that? and it would weld fine with the mig.

looks good:beer:

The whole tig thing was for modifying the header since was 304 stainless.
 
Ok--I got the MAF sensor wiring shortened.


rome150.jpg
 
Ok so I went to lop the hole in the tunnel for the rear shifter--and for the life of me I have NO DAMN idea how in the hell I fawked this up---just goes to show that even I fawk up from time to time(and it drives me nuts)

rome151.jpg


So I cleaned up the hole and welded the hole up--I didn't fully weld it due to wanting to keep the sparks down thus keeping the chances of any damage to the interior to a bare minimum..

So I got creative. He had a center consol in the rig that had to go away due to the dual cases so Idecided to rob a part off of it. Now he has a cup holder lol

rome152.jpg
 
So with that done-- it was ready to get some exhaust.. Well the guy I always used was closed down for some personal issues and the other guy I wanted--never could get ahold of.

So I went over how I wanted it done to Rome since I wasn't going to be there when it was done(working on my deck roof)...

So Rome called a place in the city--loaded the rig onto my trailer and threw him the keys to my dodge and he was off and racing (I think he liked driving my powerhouse,lol)

Well he got back in a few hours with the exhaust done....

Here is the crossover pipe--as you can see it hugs the tranny nicely to help with and clearance issues to the driveshaft(which there won't be)

rome153.jpg


Here is the stock portion of the cat and some tube--we retained the origional o2 sensor locations in relationship to the cat. (aprox 2 feet from the orional location in relationship to the exhaust manifold) and being as how they are heated o2's--it won't cause any isues..

rome154.jpg


Damn the exhaust is long lol--damn its a long truck... Nice new flowmaster(is there any other muffler)

rome155.jpg


Where do these exhaust guys learn how to weld though

rome156.jpg
 
So now with the exhaust done--I can now finish up the wiring under the rig.....

But first I had to get past an issue I found out about a while back----t-case crossmember to speed sensor (crossmember is almost 1/8" too thick )..

rome157.jpg


Here is the origional length of the stock speed sensor housing to speed sensor(marlins I believe)

rome158.jpg


So what I did---was first shave some of the plastic from the speed sensor where it lays against the cross member.
Then I shaved some of the threads off of the alumn. housing of the speed sensor to shorten it up.

rome159.jpg


And since the grive gear now sat a lil deeper into the sensor--I had to shave an 1/6" off it to make sure it didn't rub on the inside of the sensor--which doesn't affect its operation any..

rome160.jpg
 
So at this point I still needed a little more clearnce to the cross member. At this point I had to options--first removing the cross member and cuting a notch in it--or shaving some off the crossmember. After some thinking I decided to shave some off the crossmember since both methods will achieve the same thing.

So I ended up taking off roughly 1/8" at a slope from the edge..

rome161.jpg


And as you can see there should not be any clearance isues--even if the crossmember loosens from the t-case all should be well

rome162.jpg
 
Looks like it's coming along nicely.:awesomework:
But you're right, who in their right mind would let such shitty welds go out the door---doesn't look good for the shop IMHO...that closeup of the booger-welding--> that's buttwelded, a HUGE NO-NO in my book when doing exh at work, or even home for that matter....especially when subjected to wheelin abuse!!

Buttwelding the exhaust is fine, if its done right. Now those welds make my midnight exhaust job on Larry's KOH truck look great and I cant stand the way his exhaust looks and want to redo it.:mad:
 
So---time to add a little salt in the wound..

So, tonight I figured I would take it for a drive and see how the speedo works--well damn it all, the fawker don't work. So I double check what I can st the speedo connector, even remove the whole works and make sure everything is rotaing like it should--and it is.

So now I am second guessing myself that I made BOO BOO... So while its running I pull the ecm loose and out--then the rig starts running like crap and stalling.

So at this point in some quick thought---I think about the case not being grounded causing the rig to run the way it is--granted thats not supposed to happen. So I clip a quick ground to it and bam it fires off and runs ok again, remove it and it acts up.

So I remove the ecm connectors and double check the grounds--they are all peachy--WTF!!!!!!!

For some odd reason I look at the ecm case, and the lid has a dent in it. So I fire it off and let it run while I remove the 4 screws from the case, and remove the ground--damn thing runs good again. Well it seems at some point the lid got bent and was touching the solder tips on the circuit baord. So I use the a hammer and fix the lid and reinstall it. Now it runs good again but yet the speedo don't work..

So I look over the wiring diagrams--and this is where I didn't relize one of the 2 wires from the speed sensor to the cluster are not in connector C2---like the damn wiring diagrams say..

So now that I was flustered (thank work for start of that fire) I go and remove the drivers dash again and cluster. Well I was able to locate what connector the missing wire is supposed to be in on the cluster-well the damn wire is there (green/red tracer) but I have no clue where it goes once it hits the main harness back in the dash (not over to C2 like the damn scematics say--fawkers). So I run a wire from c2 over to the cluster connector and the speed works.........

So thats all fine and dandy--but it so happens while I had the cluster hanging there---I had the dash lamps on and gues what--yup the circuit board on the back of the cluster caught a ground and SMOKE. Luckily it was only a few parts of the strip and I can easily fix it--but its the damn point of it all..
 
So I did some digging tonight on the wiring--and without ripping some of the wiring loom apart I cannot tell where the speed sensor wire goes (for some reason I wanna think it goes to the cruise module). So at this point I was just going to run a new wire--but this is when I came up with a brain storm.

Ok--so since I ripped out the ABS crap out---there was still the ABS module(above the heater box on the passenger side) and wiring that was no longer used. So I grabbed the schematics for the system.. I figured out how to run a new wire for the speedo--without running a new wire---confused yet :D

So in the ABS schematics there is a wire that goes from the ABS module to the cluster....

So I located the wire at the ABS module connector..

rome166.jpg


And located that same wire at the cluster

rome167.jpg


So I nipped the wire off the cluster connector--and soldered it to the wire for the speedo wire at the cluster (sorry for the bad pic)

rome168.jpg


So now the incomming speed signal is there to the ABS module connector. So I found 2 wires that go from the ABS connector to C2 (origionally went to the diagnostic port)... So I connected the speed signal wire to one of those wires.

rome169.jpg


And nipped the wire off C2

rome170.jpg


And soldered the wire to the proper terminal of C1

So the outcome was--a workin speedo ;)

rome171.jpg
 
So I took the thing for a drive to get gas--and decided to check for any codes

rome172.jpg


And a code that I was fully expecting---but it must be a type B code because the check engine lamp does not come on.....
 
You took a pic of the speedo when it was at 20 mph, must have been when you were decelerating... :fawkdancesmiley:
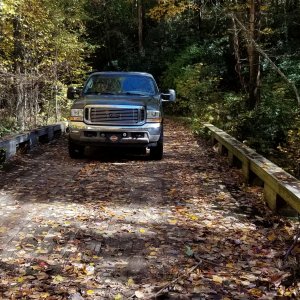
Good work man. :awesomework:
 
Holy Exhaust Shop, Batman!!


I wish I put this much time into a rig. :redneck:
I know Marlin has 2.7 badges for sale, but probably nothing for the 2.4???
 
So I drove it to work this morning..

So first thing I fire it up--damn check engine lamp is on---evap code...

The fan didn't come on till I drive almost 9 miles--stopped for a mocha but the temp stayed right in the middle--perfect..

The idle seems to fluxuate a little--going to look into that..

Other than this it was perfect...

I gotta get the vin for the thing so I can hook my snap on scanner to it and see what the data is..
 

Latest posts

Back
Top