• Help Support Hardline Crawlers :

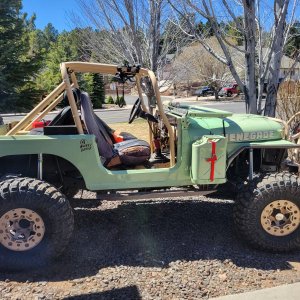
Little Gibby's 45 MB

To even out the distribution, mill the divider out of the intake. It will run way smoother on off camber hard pulls.

Going to kinda jump around while I figure some things out for the brakes.

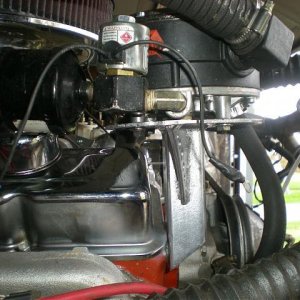
Figured I would get the throttle body mounted. Now one thing I did not realize is this is a dual plane intake so each injector will be feeding a bank. I have never experimented with that style of intake and dedicated fuel feed to each bank so I am not sure what to expect.

Also the adapter where the bore holes are, the gasket and the sealing surface at the intake are right at the edge of each other. I used a tab of sealer but I am worried down the road due to hardly any clamping force on the gasket it will fail and suck in--time will only tell there..

But the throttle body is mounted now.
 
Got the tank installed and fuel lines started.
 

Attachments

  • 20150619_212540.jpg
    20150619_212540.jpg
    55.2 KB · Views: 296
  • 20150619_212548.jpg
    20150619_212548.jpg
    53.9 KB · Views: 296
So built one like i have so many times now.
 

Attachments

  • 20150620_124541.jpg
    20150620_124541.jpg
    53.3 KB · Views: 290
  • 20150620_124629.jpg
    20150620_124629.jpg
    41.3 KB · Views: 296
  • 20150620_124638.jpg
    20150620_124638.jpg
    51 KB · Views: 293
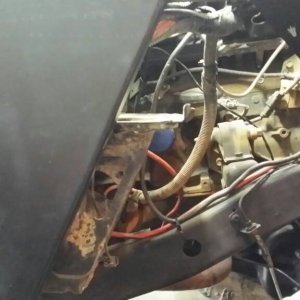
I got the pump mounted and fuel lines finished. All secured nicely and made brackets at the motor/trans to hold them.
 

Attachments

  • 20150620_202235.jpg
    20150620_202235.jpg
    49.3 KB · Views: 289
  • 20150620_202221.jpg
    20150620_202221.jpg
    55 KB · Views: 284
  • 20150620_202155.jpg
    20150620_202155.jpg
    70.1 KB · Views: 281
  • 20150620_202145.jpg
    20150620_202145.jpg
    68.6 KB · Views: 275
  • 20150620_202129.jpg
    20150620_202129.jpg
    46.6 KB · Views: 286
  • 20150620_202123.jpg
    20150620_202123.jpg
    56.3 KB · Views: 280
I prefer a bubble flair over a double flair--less likely to cut thru the hose :awesomework: They are bubble flared from the kit.
 
Gotcha. Hard to tell from the pictures. Taken off too many fuel lines to find just straight cut lines. :rolleyes:

Looks good :awesomework:
 
Onto another part of the rig. I have been collecting brake stuff for a couple weeks and enough to start on the rears.

First step was to remove the rust buildup on the rotors.

The brake hoses at the calipers I have been using short brake hoses off an astro van since they are nice and short and perfect for the rear application. The only downfall is most d44 calipers use a 7/16" banjo bolt and these hoses are for a 3/8 banjo bolt. I simply drill them out and have never had an issue with it.

I got the hardlines bent up and made a bracket to hold the tee and welded a tab on the cross member to hold the other side of the brake hose.

So that finishes off the rear axle.
 

Attachments

  • 20150622_182315.jpg
    20150622_182315.jpg
    53.3 KB · Views: 233
  • 20150622_182308.jpg
    20150622_182308.jpg
    51.3 KB · Views: 228
  • 20150622_182301.jpg
    20150622_182301.jpg
    63.2 KB · Views: 233
  • 20150622_182254.jpg
    20150622_182254.jpg
    52.1 KB · Views: 238
  • 20150622_182248.jpg
    20150622_182248.jpg
    56.3 KB · Views: 233
  • 20150620_202828.jpg
    20150620_202828.jpg
    56.4 KB · Views: 243
  • 20150620_202817.jpg
    20150620_202817.jpg
    33.6 KB · Views: 238
I got the front rotors all cleaned up of rust. To use the brake lines I wanted I had to modify the front calipers to lock the brake line to the caliper. It has been my experience that the brake hose will loosen if its not locked in place.
 

Attachments

  • 20150620_115643.jpg
    20150620_115643.jpg
    49.7 KB · Views: 184
  • 20150620_115632.jpg
    20150620_115632.jpg
    48.3 KB · Views: 189
  • 20150620_115240.jpg
    20150620_115240.jpg
    42.3 KB · Views: 187
  • 20150620_114845.jpg
    20150620_114845.jpg
    42.4 KB · Views: 196
  • 20150620_105603.jpg
    20150620_105603.jpg
    39 KB · Views: 187
I have spent the last few days getting all the hard lines bent and installed along with all the soft lines. Tight lil rig for sure..
 

Attachments

  • 20150626_204356.jpg
    20150626_204356.jpg
    45.6 KB · Views: 280
  • 20150626_204351.jpg
    20150626_204351.jpg
    60 KB · Views: 288
  • 20150626_204333.jpg
    20150626_204333.jpg
    49.7 KB · Views: 285
  • 20150626_204324.jpg
    20150626_204324.jpg
    47.6 KB · Views: 273
  • 20150626_204313.jpg
    20150626_204313.jpg
    51.6 KB · Views: 277
So ya everything is done brake wise and just gotta bleed it next and fix any leaks...:awesomework:
 

Attachments

  • 20150626_204507.jpg
    20150626_204507.jpg
    53.2 KB · Views: 289
  • 20150626_204500.jpg
    20150626_204500.jpg
    59.4 KB · Views: 277
  • 20150626_204449.jpg
    20150626_204449.jpg
    33.7 KB · Views: 276
  • 20150626_204439.jpg
    20150626_204439.jpg
    49.6 KB · Views: 278
  • 20150626_204418.jpg
    20150626_204418.jpg
    54.3 KB · Views: 275
  • 20150626_204411.jpg
    20150626_204411.jpg
    63 KB · Views: 274
Somewhat OT, but what kind of brake line bender do you use?

Its this style. I got it a number of years back at Tool Town. There are a number of companies who make this style
 

Attachments

  • 20150629_125317.jpg
    20150629_125317.jpg
    34.8 KB · Views: 230
Bunch of fluid pumped thru and a couple leaks fixed(not fully tightened fittings) but the lil rig has full brakes now.

After its been on the road a while it will need the master pumped out and fluid bled thru the system. There must have been some crud down in the bores of the master as the fluid is a tad murky but it seems to work perfect..
 

Time to build the mount for the clutch slave.

The hose for it should be here weds
 

Attachments

  • 20150629_173225.jpg
    20150629_173225.jpg
    53.9 KB · Views: 222
Got the new clutch slave built and installed. Turned out just about perfect.
 

Attachments

  • 20150629_200605.jpg
    20150629_200605.jpg
    50 KB · Views: 217
  • 20150629_200549.jpg
    20150629_200549.jpg
    52.2 KB · Views: 225
  • 20150629_200538.jpg
    20150629_200538.jpg
    61.5 KB · Views: 226
So i had to do a ton of searching and reading to figure out how the Rockwell T221N transfer case shifter linkage is supposed to be. So judging by all the info and picks i found there is a second reinforcement bracket that butts up against the primary one. I will get the floor cut out behind the tranny hole and see if i can simply add to the primary bracket.. I think that will work. ..or better yet i can make it so
 

Attachments

  • 20150701_200211.jpg
    20150701_200211.jpg
    34.7 KB · Views: 191

Latest posts

Back
Top