• Help Support Hardline Crawlers :

The snawsage version---- something

At least look at how the torque flows thru the case on paper first. Not sayin' it will or won't. I don't know. But as expensive as that case is.....


Who cares if it grenades...

Robin has mentioned several times how he has "deep pockets"..

buying another Atlas to him must be like buying a gallon of milk to the rest of us poor white trash...

:redneck:
 
Who cares if it grenades...

Robin has mentioned several times how he has "deep pockets"..

buying another Atlas to him must be like buying a gallon of milk to the rest of us poor white trash...

:redneck:


:booo: the deep pocket days are over:booo:
 
ain't that a bitch...

It acually makes for aless stressed life. I also spend more time doing things I enjoy instead of wantitn what I dont have.................You seem to have a special interest in me....are you sweet on me?
 
Before you put that to a practical test, you owe it to yourself to look at the power-flow diagram inside that gearbox. It wouldn't surprise me if it just grenades itself as two different sets of gears are engaged at the same time, completely binding the case. At least look at how the torque flows thru the case on paper first. Not sayin' it will or won't. I don't know. But as expensive as that case is.....

I ran the case on the bench--it doesn't bind up at all...
 
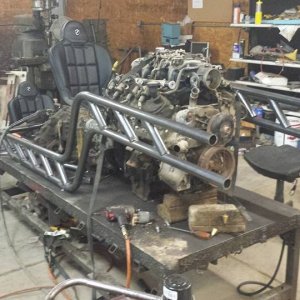
Ok--I threw this heady turd back in. Granted with how long the input is and the belly pan---the hardest part was getting in into and sitting in the rig...

robin85.jpg


Ok--another thing I needed to change--was the vent for the C6.. The way it sat wasn't going to work with how I wanted to do it--so I ripped it out (only thing holding it in was the epoxy) which wasn't too at all.

So I looked as possably moving it--but looking at the tailshaft---the breather was actually in the best spot it could be. So I was able to tap it slighly to 1/4"npt (hole was chambfered and the baffel was pretty shallow).
So I just went and took 1/4" npt to 1/8" npt bushing and cut it just right--and was able to screw it in--along with some epoxy to ensure its strength... And now the vent goes at a 90...

robin86.jpg
 
Ok so at this point I started bouncing around--but I will get to that in the next couple days as I have only partialy finished those items and will wait till they are done....

But I have 3 things to finish mounting--CO2 tank--which I have figured out how I want to do it. The trans res tank--finally found where I want it to go--and the joystick for the rear steer.

I knew where I wanted it--but finally figured out how I wanted to do it......

I fully built the mount--and since its located right next to the t-case and with out the t-case comes out--I went and made it removable (5 bolts)...

robin87.jpg


robin88.jpg


robin89.jpg
 
Look great as usual, but I'm a little confused..........where do I sit?


And lets not forget a place for the nitrous bottle and gasoline tank.


I had to think of something for that extra switch. The gas tank if for the extra fuel when I hit the special button.
 
Last edited:
Ok so my next task--to try and finish up the plumbing under the drivers floor.

Now my origional idea was to use the soft blue hose for the vents--well I thought about it for a while and plus robing brought a bunch of hose--I decided to go with rubber hose instead since it can be smashed and smashed and smashed and it won't care a bit :awesomework:

So from the diff its 1/4" hose (factory unimog size)

robin90.jpg


robin91.jpg


So the diff vents also tie into the t-case--and once it does that the hose ups to 3/8 hose.. But down in that bundle there are diff vents, t-case, both front brake lines and the air line from the co2 tank. It was pretty tight and goes way up front before it dives over the tranny/firewall to help protect it from the front diff (will hammer the y-pipe well before it does the hosing)...

robin92.jpg


And here is what I had to do for the brake lines at the locks----due to the extreemly sharp bends needed due to the rear steer valve and the lack of room between the center and the seat--I opted to run short sections of hardline.

robin93.jpg
 
Ok so 95% of the stuff under the floor is done. So I went and had fun with my body saw and made the panel fit again :redneck:

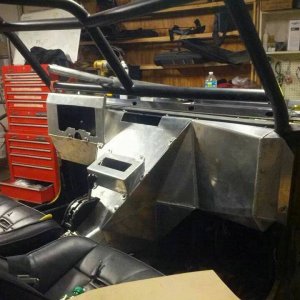
So the only tricky part with the joystick mount---due to how the panel slides in--you have to install the mount after the panel is on. Its not real hard--just kinda tight with the 2 bolts down on the side...

robin94.jpg


robin95.jpg


So I went and threw the seat in since I knew you would be curoise robin :redneck:

It fits almost snug against the seat

robin96.jpg


And here is a crotch shot for ya :haha:

robin97.jpg
 
Aww shiat you want to get in there too? Jeez you are demanding! :haha:

He is going to be soooo confused the first time he drives it----so I am going to park so there is nothing to run into for several several feet


And damn---my pic server just went down :mad:
 

Latest posts

Back
Top